Webhooks Setup
To set up webhooks (formerly known as IPNs), you first set up your server and URL, and then configure the webhook settings in your BlueSnap account. After setup is complete, you might want to run a test to simulate an webhooks.
Webhook Types and Parameters
Webhooks are sent as POST requests that contain parameters with data about the event:
For a list of available webhooks, refer to the Webhook Name Reference.
For descriptions of all parameters that can be sent in a webhook, see Webhook Parameter Reference.
Step 1: Server Setup
To receive and process BlueSnap webhooks, you must set up your server and provide a URL where the webhooks can be sent.
SSL is required. Configure your server to support HTTPS with a valid server certificate.
Webhooks Request-Response Flow
Request: Your server should listen for the webhook messages from BlueSnap. These are typically sent in real-time with each event. The request will have a Content-type of "application/x-www-form-urlencoded".
Response: After you receive the webhook message, you should send an empty HTTP 200 response to BlueSnap.
If BlueSnap does not receive a confirmation that you received the webhook, we will make up to 11 attempts to resend it.
BlueSnap IP addresses
Webhooks are sent only from these BlueSnap IP addresses, so you may want to authorize these IPs.
209.128.93.254
209.128.93.98
141.226.140.100
141.226.141.100
141.226.142.100
141.226.143.100
209.128.93.232
141.226.140.200
141.226.141.200
141.226.142.200
141.226.143.200
Code Samples
The following JSP examples show how a merchant can capture and log the webhooks data sent from BlueSnap. These webhook receiver examples check whether the webhook comes from BlueSnap servers, decode and parse the webhook, and then print the webhook to a log. There is a separate webhook receiver example for Production and Sandbox, with the relevant IP addresses per environment.
<%@page import="java.util.Arrays"%>
<%@page import="java.util.HashSet"%>
<%@page import="java.util.Set"%>
<%@page import="java.net.URLEncoder"%>
<%@page import="java.util.Map"%>
<%@ page language="java" contentType="text/html; charset=utf-8" pageEncoding="utf-8"%>

<%
String ipAddress = request.getRemoteAddr();

Set blueSnapIps = new HashSet(Arrays.asList("62.216.234.216, 209.128.93.254, 209.128.93.98, 38.99.111.60, 38.99.111.160, ..."));

if (blueSnapIps.contains(ipAddress)) {
  Map parameters = request.getParameterMap();

  for (String parameter : parameters.keySet()) {
		System.out.println("[" + parameter + "=" + java.net.URLDecoder.decode(parameters.get(parameter)[0], "UTF-8") + "]");
  }
} else {
	System.out.println(ipAddress + " is not a BlueSnap server!!!");
}
%>
<%@page import="java.util.Arrays"%>
<%@page import="java.util.HashSet"%>
<%@page import="java.util.Set"%>
<%@page import="java.net.URLEncoder"%>
<%@page import="java.util.Map"%>
<%@ page language="java" contentType="text/html; charset=utf-8" pageEncoding="utf-8"%>

<%
String ipAddress = request.getRemoteAddr();

Set<String> blueSnapIps = new HashSet<String>(Arrays.asList("209.128.93.232, 62.216.234.196. 38.99.111.50, 38.99.111.150, ..."));

if (blueSnapIps.contains(ipAddress)) {
  Map<String, String[]> parameters = request.getParameterMap();

  for (String parameter : parameters.keySet()) {
		System.out.println("[" + parameter + "=" + java.net.URLDecoder.decode(parameters.get(parameter)[0], "UTF-8") + "]");
  }
} else {
	System.out.println(ipAddress + " is not a BlueSnap server!!!");
}
%>
Step 2: Enabling Webhooks in BlueSnap
Secure URLs
Webhooks are transmitted via an HTTPS POST request to a unique URL on your site's server, which you define. Each URL must use the HTTPS protocol or the URL is not accepted.
We recommend that you enable webhooks for your entire BlueSnap account, which applies your webhook settings to all contracts in your account.
You can then define a different webhooks URL for a specific contract, if needed.
Configuring your Account Webhooks Settings
The following steps describe how to enable webhooks for your account and add the webhook URLs to your account settings. After this is complete, BlueSnap begins sending webhooks to your URLs in real-time.
-
In the Merchant Portal, go to Settings > IPN Settings.
-
Select the Receive Instant Payment Notifications check box. If you ever want to pause webhooks for your account, select Pause IPN Sending (only available through admin accounts).
-
In the IPN URL(s) field, enter the SSL enabled URL where you want to receive the webhooks from BlueSnap. All enabled webhooks are sent to this URL. Once you have entered your URL, you can test it by clicking the Test URL button to the right of the entry field.
-
(Optional) If you want to authenticate that a webhook originated from BlueSnap, you can add an encryption key by using the Generate Key button to create one or by entering your own key in the field. You can use this feature to validate the authenticity of the message.
- Using this feature adds two custom headers,
bls-signatureandbls-ipn-timestamp, to your webhook requests. - The value of
bls-signatureis the signature of thebls-timestampconcatenated with the webhook body in HMAC-SHA-256 using the encryption key. For example:2025-03-12 13:02:57.878<webhook-body> - You can compute the hashed output (
bls-signatureheader value) of your secret key with an online SHA-256 tool (such as HMAC-SHA256 Hash Generator.- Enter
bls-ipn-timestampconcatenated with the webhook body. The timestamp should be first and there should be no spaces between the timestamp and the start of the webhook body. - Enter the generated secret key.

- Click Compute Hash and validate against the received webhook header to confirm the hash output is the same as in
bls-signature

- Enter
- Using this feature adds two custom headers,
Enabling Webhooks
-
To enable specific webhooks, click Select IPNs .
-
In the section that opens, toggle the button next to each webhook type that you want to receive. Be sure to click Save in order to save your changes.

- To have webhooks sent to an additional URL, click Add IPN URL, and then enter the additional URL where you want to receive the webhooks from BlueSnap.
- If you want to have any webhooks sent to this additional URL, toggle the button next to each webhook type that you want to receive. Note that any webhook types you select here are also sent to your main webhook URL. Click Submit.
- When setting up Instant Notifications as a merchant, you can select the Require Notification Receipt option to obtain confirmation that the incoming notification has been sent from BlueSnap. This authentication process requires you to complete a number of set-up steps, and you should only select this option when you are ready to complete the process; otherwise, you might begin receiving automated notification failure messages.
Note
If you have not already done so, you must set up a Data Protection Key
Your Instant notifications process must be able to handle the encrypted attributeauthKeyand set a response ofOK + Data Protection Keyencrypted in MD5 Hex.
Once this option is enabled, BlueSnap treats each webhooks that does not get an encrypted response as a failure and attempts to resend it up to five more times.
Configuring a separate Webhook URL for a Specific Contract
Follow these steps to define a different webhook URL for a specific contract. This overrides the global webhooks URL defined for the account.
-
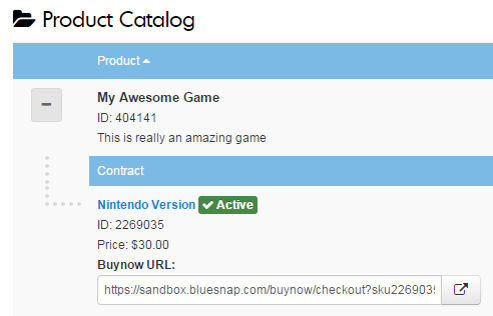
In the Merchant Portal, go to Product Catalog > Products in the left menu.
-
Expand the relevant product to view its contracts, and then click the name of the contract where you want to set up a webhook.
-
In the Notifications section, select Receive Instant Payment Notifications check box.

-
Select the checkbox next to each webhook type that you want to receive.
-
Select Use a specific IPN URL for this contract and enter the URL(s) where webhooks for this contract should be sent.

- To have the webhooks sent to an additional URL, click Add IPN URL, and then enter the additional URL where you want to receive the webhooks from BlueSnap.

- If you would like to have any webhooks sent to this additional URL, select the checkbox next to each webhook type that you want to receive. Note that any webhook types you select here are also sent to your main webhook URL. Click Submit.
Step 3: Testing Webhooks
Before you go live, we recommend testing your webhooks and ensure you properly receive, process, and respond to the notifications.
Troubleshooting
If you have set up your webhooks URL but you do not receive an webhook, you can follow these troubleshooting steps:
- Resend the webhook: In the Merchant Portal, click Find a Transaction, then go to one of your existing order records. In the Resend Menu, select IPN, and click Send.

-
Verify that the webhooks URL is set up at both the account and contract level: Check the account-level webhooks settings under Settings > IPN Settings. In some cases, you may have different contract webhook settings, which overrides your account-level webhook settings. Check the contract-level webhook settings on the General contract settings page, under Notifications.
-
Try simulating an webhook, as described below.
-
If you still don’t receive webhooks, contact Merchant Support.
Simulating a Webhook
There are two ways to simulate a webhook so you can verify that you are receiving the webhooks and debug any potential issues.
Option 1
-
In the Merchant Portal, go to Settings > IPN Settings.
-
Using the IPN Simulator, select the webhook you want to test and enter the URL to use for testing.
-
Click Generate IPN.
-
The IPN Simulator generates the selected webhook and sends it to the URL entered. The parameters in each webhook are the same parameters used in production; however, the values returned are generic.

Option 2
-
In the Merchant Portal, go to Settings > General Settings.
-
Enter your email address in the Admin email address field so that you receive any emails about webhook errors, then click Submit.

-
Create a contract with a specific webhook URL (refer to Configuring a separate IPN URL for a specific contract). For this contract, enter an invalid webhook URL. This forces BlueSnap to send a webhook error email with a copy of the webhook.
-
Place a test order via the BuyNow checkout page for the contract you just set up.
When the order is complete, BlueSnap sends an webhook.
Because the webhook URL is invalid, BlueSnap copies the webhook to an email and sends it to the Admin email address you defined. You can then use this example webhook to parse each of the parameters and verify that they are configured correctly.
Updated about 10 hours ago